ADVANCED GIT CONCEPTS - ADVANCED GIT WORKFLOW
ADVANCED GIT CONCEPTS - ADVANCED GIT WORKFLOW

ADVANCED GIT CONCEPTS - ADVANCED GIT WORKFLOW
Over the last few posts we have been focusing on Git and all its concepts from basic to advanced, this is because it is one of the most important tools to have under your developer belt to make you valuable.
Today we will be focusing on the advanced workflow involved with forks, branches and pull requests and more.
Let us go over all the topics we will be covering during this particular article, ensure to start your computer and open your Git bash to enable you run the commands.
TOPICS
- Cloning and pushing a forked repository
- How to create branches and switch between them
- Programming Nomenclature
- Creating pull request from a forked branch
In order to make everything more relatable, it will provide a repository link for everyone to fork and experiment with. You will find it here .
CLONING AND PUSHING A FORKED REPOSITORY
We have already discussed the two concepts of forking and cloning separately, today we will talk about them altogether. First of all you have to remember that when you fork a repository, it appears on your repository and thus you can clone it very easily if you follow instructions.
Let us start by cloning any repository on Github, remember to change directory to where you want. We use the usual command “git clone
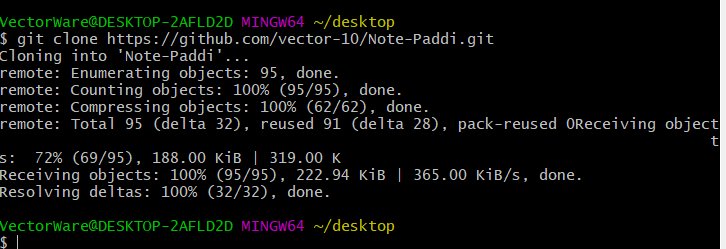
Once we have cloned it, we can make edits to it and then push it back to github using “git add .”, “git commit -m “commit message” ”and “git push” to Github. Check the code block down below for guides.
git add .
git commit -m "commit message"
git push
From carrying out this process you can actually see that the process remains the same for cloning and pushing forked repositories. This part is very crucial when understanding what comes next in creating branches from repositories. Remember we are still in the workflow and because of that you should use the demo repository provided earlier for all your experimentation during the course of all the topics. Let us look at how to create a branch next, imagine you want a feature such as a like button to an app but then you are not sure how it will affect the main app. A branch is then created to develop this feature independently and then merge to the original to ensure stability of software.
HOW TO CREATE BRANCHES AND SWITCH BETWEEN THEM
A branch is a version of your repository existing independent of the mainstream/branch. As earlier said, it is used majorly in teams to build code features independently without disrupting the flow of the entire code base repository. It is very important when working on very large projects, it has numerous advantages especially in the area of error handling and stability.
Let us look at the command to create a branch from a repository in the code block below, it is important to note that you would be required to name the branch and this will be talked about more in the topic programming nomenclature.
To create a branch make sure you have a repository you are currently into on your Git Bash command line tool, then run the “git checkout -b” command like in the code block shown below.
git checkout -b name_of_branchNow you have created a branch, it is important to make sure you remember the name so as to avoid mistakes and errors when switching branches. Let us look at how to switch between branches below.
git checkout name_of_branchNow you can see the name of the branch you wish to switch to is the one you will actually refer to in your code. It is important to note that you can create more branches from each other depending on the structure and nature of your project.
HOW TO MERGE BRANCHED REPOSITORIES
Just like branching requires you to create a separate independent version, merging requires you to join branches back together to the main branch repository after you are done with all additions during your workflow.
So let us say after creating a branch from our forked repository, we want to merge it to the main branch. We use the command “git merge branch_name”. Note that the branch name is whatever you chose earlier when you created the branch. Let us look at the code block below to merge the branch, It is important to make sure that all changes are properly saved to avoid merge conflicts on the Git bash.
git merge name_of_branchPROGRAMMING NOMENCLATURE
Some experienced programmers argue that naming functions, branches and a lot of other use cases. The most important tip you should adhere to when naming is to make sure they correspond to the function or activity or task.
This section, though small, is dedicated to making sure you understand how important it is to name your functions, branches very well.
Example: Imagine we were creating a function or branch related to an arithmetic branch, it is safe to use the name “ arithmetic_branch”. This name may sound very simple but it is useful when recalling names and reduces confusions. This concept is one which will help anyone in his/her journey as a developer.
CREATING A PULL REQUEST FROM A FORKED BRANCH
As earlier said, we have talked about forking, its meaning and how to clone and push these repositories. Let us talk about pull requests, a pull request is a notification sent to a Github user through the user interface to inform them that you are done working on a feature so that a merge can be carried out by the administrator of the forked branch.
Imagine you have finished working on the features you wish to implement on the forked branch and you are ready for actual production. You are required to send a pull request to the repository author/admin. The author then receives the pull request and goes through your code changes to ensure that all is in line with the project in question.
Carrying out a pull request is very simple, all you have to do is click the button at the top left corner as you will see below, this is one activity that does not require writing code on the command line.

Let us go over every single activity we performed today:
First we forked a demo repository provided, after this we made changes then pushed this repository to Github. Our next activity was to create branches and we discussed the reason why they are used and their importance in software development.
After this we talked about nomenclature / naming of branches and functions in Git workflow and coding in general. It was advised to use names related to the actual field in question in order to make for easy recollection and avoid errors.
Fro more resources and extra advanced knowledge, check out this article.
What's Your Reaction?